I have mixed emotions about Facebook. In fact, it can take you through your full range of emotions in one session... happy, sad, touched, annoyed, reflective, inspired...

But what I love about Facebook is reconnecting with old acquaintances and discovering where life has taken them.

Emily is one such acquaintance from high school. After reconnecting last year, I learned that she is an amazingly talented photographer. I've been in awe ever since.

There is an angelic quality about her work.


There's an angelic quality about her heart, too.

Emily put together a very helpful post on her own blog this week about styling your entire family for photos (without breaking the bank!). Given this is the most beautiful time of year, I know many of you are planning your own photo sessions and thought you might find her advice helpful.


So, head on over to Here On Earth Photography to meet Emily. Your heart will be warmed and I know you'll leave inspired.

Happy Friday!


I had a rude awakening this summer.

"Mom, I want a pair of aviator sunglasses. Because they're cool. And because directors wear them."

{What?! Who is this little man and where is my baby?! When did he start to care about "cool?!"}

So, we scoured the entire mall to find the perfect pair and came out victorious by the little guy's standards. And he wears them. All. The. Time.

Fast forward to this past weekend... as I was cleaning up my flannel sheet scraps from my bean bag project, I was inspired to create a soft sunglasses case for his prized pair.

Look! Half of the work was already done for me! Here's the how-to.

Take a 9" x 9" square scrap, including the edge hem on one side. This will be the drawstring casing!


Cut the edges of the casing at an angle.


Fold the square in half, right edges together.


Sew a 1/2" hem down the long side and the bottom. Be sure to back stitch the beginning and end of your seam. I surged my edges, but this isn't necessary. This fabric doesn't really fray.


Turn the case right side out and insert your drawstring. I found a piece of leather to use as my drawstring. I added a wooden bead to cinch it tight.


Such a super easy and functional project! The soft fabric can be used as a cleaning cloth, too.


In closing, we'll leave you with our best "tough guy" faces...


Good grief. He looks like he's had practice. I look like an angry Elvis impersonator...

The throw pillows for my couches always seem to be on the floor.

And this drives me CRAYYYYY-ZEEEEEE.

It doesn't matter how much I complain. Yep, there they are. Back on the floor again...

Time to change my strategy and give those boys what they never knew they needed.

Bean bags!!!

I pinned this awesome bean bag cube from Ballard two years ago.


I've seen other inspirational designs, like these from Crate and Barrel:


A few weeks ago, I stumbled upon an awesome tutorial for bean bag cubes from Gina of The Shabby Creek Cottage. For my own bags, I followed her tutorial step-by-step - only opting to include a zipper closure, rather than closing everything up with a seam.

Before I cut any fabric, I tracked down the foam beads that I needed to fill the bags. I found the best deal from Walmart.com - so I ordered three boxes! The desk clerk was so confused as she tried to figure out what might be in these large boxes. They felt feather light!


I made two different sized cubes - 24 x 24 for the bigger boy and 18 x 18 for the younger. The larger cube took 1 1/2 bags of filler. The smaller bag took nearly a full bag of beans.

{By the way, these little beans have a mind of their own. I recommend enlisting the help of someone else when filling your bags!}


For my fabric, I used a soft, flannel twin-sized sheet (that I already had) for the smaller poof. If this is of interest to you, I think you can actually get two cubes out of one sheet! Talk about a bargain!


 And, here's the finished 18" cube! It's soft, slouchy, and totally portable for my little guy.


The 24" cube is HUGE! Much larger than I anticipated. But, Dylan loves it. I used some leftover decorator fabric that I had on hand.

I tried to get the guys to pose for a few pics.


That quickly dissolved into this...


And this...


{It was much less violent than it looks.}


Oh well.

For a total investment of around $20, there is no reason not to make your own. Happy (happier?) lounging days ahead!
When we were looking at homes online, before seeing them in person, we came up with a nickname for each property.

The nickname for this house?

"The Toilet House."

Any guess as to why?


Oh, geez. Where do I begin to highlight the weirdness of this room? The vacuous, sterile space? The 80's-tastic bar lighting? The toilet with no privacy? The door with a window that gives the neighbors a bird's eye view of said toilet?


The teeny-tiny shower opposite the HUGE, dated Jacuzzi tub? Peel and stick tile?


All along, we've felt that this room has the most potential, but it's a challenging space to design for. There are two skylights, a door to the back deck, and a bay window.

Over the past 6 months, we've had six or seven contractors come in to evaluate the space. We just felt that this was a project too big for us to take on alone. To date, we've only heard back from one contractor. His price tag? A whopping $40,000.

Now. We've built three homes and I just couldn't wrap my head around investing that much into this one space. So, we've waited and waited and called and called to find out what other estimates might be.

And... no. one. will. call. us. back.

Clearly, business is booming for contractors in our area.

Jesse's patience finally ran out last week. He started demolition and I came up with a layout that I think will work!


And, here is the current state of affairs.

{Pardon the mess...}

The massive tub and marble surround is gone.


The shower and toilet are gone and the framing is up for the walk-in, tiled shower. It will have a frameless glass door and half-wall.


And that super-awkward door to the back deck? Walled up!


This is my color inspiration for the space. We've already purchased the paint and I can't wait to crack it open!


The next step for us is plumbing - which we will NOT be doing ourselves. We hope to have someone in next week to work on that.

We're just figuring it out as we go, folks. Thanks goodness for YouTube.com, HGTV.com, and the DIYNetwork.com!
"How important it is to recognize and celebrate our heroes and she-roes!"
~Maya Angelou~

I'd just seen my oldest board the bus and was heading to work. Suddenly, I noticed my lovely neighbor waving me down so I pulled over to chat.

"Did Dylan tell you about what happened on the bus yesterday?"

{fear... horror... wonder...}

She relayed a story about Dylan falling victim to a bully on the bus (something he never shared with me) and proudly shared how her daughter stood up for him, going as far as to report it to the school administration.

{sadness... pride...}

As I began processing all of the other emotions that followed, one kept rising to the top—sheer admiration of this small girl who did a really big thing. I had to figure out a way to honor her.

My go-to? You guessed it... something handmade... something celebratory... something a tween might appreciate? A sparkly confetti necklace!


Here's what I used.


I used a simple hole-punch to make the confetti and began layering it on my wooden disc with Mod Podge and a toothpick (one end as a brush, the other as a positioning tool), allowing the confetti to overlap the edges of the circle.


I printed and punched my quote and added it to the back of the disc while the front was drying.


Once the front was dry, I trimmed the overlapping confetti from the edge of the disc.


The newest material to me was Mod Podge Dimensional Magic. This was a first experiment with this medium.


{Learn from my mistakes} I added way too much to the top of the confetti side and it began to drip down the sides. Oops! Start with a thinner coat and build up.

A few hours later, I added a few more confetti pieces and another layer of Dimensional Magic to create more dimension to the piece.

Once all was dry, I sealed the back with traditional Mod Podge and added a silver bail with E-6000 adhesive.


You know how I like to overthink things. It's just how I roll... I remembered that I received a bottle cap in an assortment of jewelry findings and thought that I could make this pendant even nicer with that serving as my tray.


All was looking great until I became too impatient and added the epoxy bubble to the top before the Mod Podge was dry. There was too much moisture trapped in the layers below. It doesn't look bad, but it could have been perfect {with a little patience on my part}.


I hope my little hero will wear her special necklace. I can't wait to give it to her this weekend. Not having girls of my own, I can only guess about what she might actually wear.

Unrelated, but related... I gave a Hello Kitty poster and marker set to a feisty little 6-year-old down the street, who promptly informed me that she doesn't care for Hello Kitty - at all. Oops. Clearly, I'm out of touch.

Well, I'm so pleased with how these turned out that I might just make one for everyone. There is no limit to the looks you can achieve with different papers and textures.

I'm thinking about vellum... Ooooooo...
I've written before about my affinity for "Grow With Me" nursery themes. I mean, you put so much into a baby's special space... it's nice to see it work a little longer!

I chose vintage cowboy decor for my oldest son and vintage baseball for the younger. Well, it's been nearly nine years for the older, four years for the younger, and we're still rockin' most of their original nursery character.

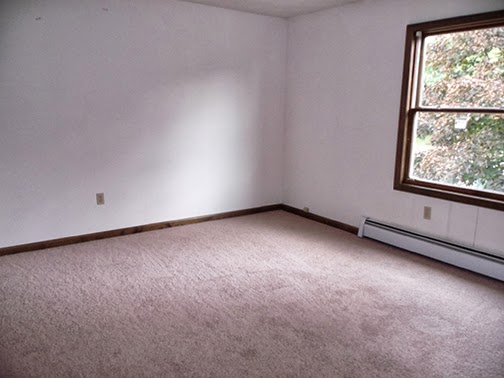
The picture below is my youngest's room in the new house - pretty typical of the rest of the house. Terrible carpet, bad paint, no lighting.
 

And, here's his room today! A few coats of paint, lighting, new carpet, 2" wooden blinds, and it's now a warm and cozy room for the little tyke. The bedding is a Tommy Hilfiger steal that I found on Overstock.com. It's a comforter set paired with a denim bed skirt.


Remember my subway art project? It greets visitors as you enter the room.


We installed a new closet system to be multi-functional. It's fantastic, but not inspirational to look at so we'll just keep the doors closed for now...


I made a simple bolster pillow with leftover nursery fabric and my sports letter appliques.


My penny-punch art project is hanging proudly on the wall.


And the furniture... can we just chat about this furniture for a minute? We left the nursery furniture behind when we relocated to Pennsylvania and we were in the market for something with longevity. We were so excited to find an Amish furniture store in our local area. We ordered this set and anxiously awaited its arrival for months.

It could not be more perfect - it's simplicity, amazing craftsmanship, beautiful wood... this is a set that will be with us for the rest of our lives.


I seem to end each of these posts with the same closing - we have really come a long way toward making this house a home. I absolutely love it.

We're embarking on our biggest DIY project yet - the master bathroom.

Hope we don't get flushed away!