I've had "Complete my oilcloth iPad cover" on my monthly list of to-do's for some time now. I have the "standard issue" cover that my office provided to me, but it is lacking a few features. I needed something that could carry the keycard to my office, a notepad (because sometimes you actually need to write something), and a place to keep a pen.
You should know that most of my projects are born from trial and error and this one was no exception. I made a couple of mock-ups that just didn't work.
Yeah. I don't have any pictures of those.
Here are all of the materials that I needed. I'll describe them better as I go along.
By the way, I'm giving the above materials away so you can make a case for yourself! Keep on reading to learn more.
I first cut two pieces of checkered oilcloth (9" x 10 1/2") to serve as my front and back panels.
I then created my piping. I cut a 30" piece of 1/4" cotton cording and a 32" x 1 1/2" piece of oilcloth. Using a zipper foot, I basted along the length of the oilcloth to contain the cotton cording.
I cut a contrasting piece of oilcloth (9" x 8") to serve as my large exterior pocket. I added a 1/2" hem to the top edge and trimmed it out with a simple grosgrain ribbon.
To form the card pocket (which also fits an iPhone!), I cut a small piece of oilcloth (3 1/2" x 3") and added a little ribbon detail to the top of the block.
I attached the card pocket to the lower right-hand of the exterior pocket by using a satin stitch. If your machine doesn't have a satin stitch option, you may also accomplish this look by setting the width of your zigzag stitch to its shortest option. I only stitched the left side of the pocket, leaving all other sides free.
Next, I added the pen loop. I cut a piece of oilcloth (3" x 1"), folded it in half, and stitched it just below the ribbon detail of the exterior pocket.
My next step was to baste the exterior pocket to the front side of the cover, using a 1/4" hem.
I attached the piping to the backside of the cover, using a zipper foot and a basting stitch.
Frontside and backside are ready to go!
Right sides together, I stitched a 1/2" seam around the edges (still using the zipper foot!).
Turned it right-side out.
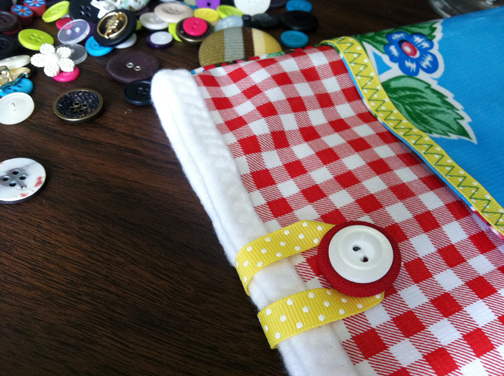
I stitched a ribbon loop to the right side of the back panel. The length of this ribbon will depend on the size of the button that you use. My length was 6".
I folded the length of my fleece in half (16 1/2" x 10 1/2" folded to 8 1/4" x 10 1/2") and stitched the long edge together with a 1/4" seam.
I inserted the exterior shell into the fleece liner - right sides together - and stitched a 1/2" seam around the top of the case.
I pulled the fleece lining up and tucked it into the exterior shell.
I added a zigzag stitch around the top of the bag and added my button.
And, that's it! I elected to leave the bottom of fleece lining open, unstitched, and it worked out beautifully!
It's so cute and kinda funky - the essence of oilcloth.
Strike this project off of the list!!
**smile**
Want to make your own? I'll provide you with the materials you need to make it happen. Leave me a comment below and I'll select a winner next Sunday (at random, of course) to receive the pretty package of materials pictured at the beginning of the post.
Happy sewing!!