In preparation for our six hour drive to Florida, I whipped up some jello fruit snacks that I found on Pinterest, courtesy of the genius women behind Six Sisters' Stuff.

Three ingredients: flavored gelatin, plain gelatin, and water! No carnuba wax or anything else objectionable found in store-purchased treats.


They were super simple to make. I purchased molds at Michael's to form individual candies.


Blackberry, cranberry, and orange-flavored treats were enjoyed by all. I stored them in a Tupperware container and they kept fresh until they were all eaten!


I think these were the only things eaten in the car that didn't make a total mess!

We just returned from a week-long trip to the beach at Saint Augustine, Florida. This was our first real vacation in about three years!

Mind if I share a few highlights? I'll spare you the pics of me in a swimsuit!


{We're both smiling here, but notice my defensive position against attack by fork!}


{Look who's wearing her new top!}


Hopefully we'll make time for another vacation before another three years pass us by!


So... I snuck in a quick top this week. We're heading to the beach for vacation and I wanted something new to take with me.

{And, who has time to shop? I find it much easier to fit in a few short sewing sessions!}

I found this beautiful embroidered cotton at Joann's a few weeks ago and had no real idea about what I wanted to use it for. After a quick review of my patterns, I settled on Butterick 5644.


This was such a simple top to make and the fabric was perfect for it!


I originally cut a medium, but wound up taking in the bodice by about 4"! I have that irritating pear shape that makes it difficult to find things that fit. So, I left the bottom as a roomy medium and tailored the top to fit perfectly.


I can wear it with shorts, jeans, or leggings. It's a great length for practically anything!

I'll be leaving the jeans behind on this trip, though!

So, after I completed my magnetic storage tins, I realized that I needed some way to know what was inside - at a glance, rather than by opening each to find what I am looking for.

I knew that I didn't want something permanent, as I'm constantly repurposing!

My solution? Little magnetic markers utilizing scrap ribbon, buttons, and... SHRINKY DINKS!!!


If you're familiar with my blog, you know how I love a Shrinky Dink project.

I opted for the regular frosted sheets, rather than the inkjet version, because my printer is out of ink.

{Note to self: Must buy printer ink!}

I used my Martha Stewart 1 1/2" circle craft cutter to punch my tags and wrote on the slick side of the punched circle with a permanent ink pen typically used for scrapbooking.


You can see that I tested one first to ensure that my ink would adhere properly. It did!


I watched the magic unfold in my toaster oven...


By the way, I keep a toaster oven in my studio. It has become just as important as my sewing machine! This is an older one that we own, but it works great for my crafting purposes!

I cut little flags from a piece of scrap ribbon...


Layered my buttons and Shrinky Dinks using E6000 adhesive...


Cut small strips of magnetic vinyl to add to the back...


And, that was it! A perfect, non-permanent, fun solution for labeling my magnetic storage tins.

I can change my mind about the tin's contents and have no problem swapping the labels to reflect what's inside!

I just love the effect, too.


In my previous post, I mentioned that I am revamping my studio space. As part of that, I covered an Ikea magnetic board with burlap and mounted it to the side of my bookshelf with 3-M picture hanging strips.


Here's the finished product.


Click here for instructions about how to personalize an Ikea magnetic board with fabric.

I made a few other magnets with glass tile project fails. They are perfect for adding personality to this magnetic board!


I'll be working on my creative space this week and hope to share the results with you. Now that my classes are over (for a month), I'm doing what I can to usher in peace and calm to my surroundings!

I hope you have a great week ahead! As always, I'd love to hear about what you are working on!

Did anyone pick up on the Nirvana reference? Is that past your time?

{I'm on a 90's grunge rock kick!}

Speaking of the late 90's... I used to love Brighton jewelry! I still do, but my jewelry trends have changed since then.

My husband loves to indulge me when he's familiar with something that I really love - and, for him, he was comfortable going to the jewelry counter and loading up on Brighton.

Brighton earrings. Brighton necklaces. Brighton belts. Brighton shoes. Brighton purses. Brighton sunglasses. Brighton hair accessories. Brighton... lip stick holder...

I just love that man.

Along the way, I've amassed quite a collection of Brighton tins.


I knew I should save them. They are so darn cute and functional!

I'm in the process of reorganizing my studio and had the sudden idea to turn them into magnetic board storage!

This was all that I needed to make it happen.


{By the way... E6000 is the best adhesive ever! Forget super glue! Just a small drop is all you need.}


I used three magnets on the backs of the smaller tins and five on the backs of the larger.


My next step was to gather the small items to store in my cute little heart shaped storage boxes.


That presented another dilemma... how would I ever remember what was inside of each?

That solution will follow in my next post!
This blog post title is appropriate for so many reasons.

First of all, my summer semester is almost over! This time next week, I'll be free from this prison for nearly one whole month. I have an intense fall semester ahead, but after that, I'll be done with my master's program.

**whew!**

Now, back to the project at hand {and more "bustin' out" references to come}...

You should know this about me. When I know that I have people coming over the house, I find the motivation to complete those little projects that I would avoid otherwise. That is the ONLY reason those things get done.

As was the case this week.

We hosted dinner for our 4th of July celebration. Our sofa pillows have long been a source of embarrassment for my husband. He doesn't usually get worked up about such things, but this was a point of contention for him.


I agree. They look terrible. I purchased them to stage our last house when we were selling and they didn't look too bad then. But, my kids have totally abused them since. In fact, one pillow's seam ripped and stuffing is always strewn around our greatroom anytime my 2-year-old is left unsupervised.

{Hmmm... stuffin' is "bustin' out?"}

On Sunday, my husband sighed deeply and said, "Is it really that difficult to sew up this seam? Or make new pillows?"

{Well, no. But, I have 1,002 other things that I'd rather do.}

He doesn't ask for much, really. So, I caved and quickly worked up some new pillows on Tuesday night in anticipation of our company coming over on Wednesday.

I actually like the pattern of the offensive pillows. It coordinates with my other fabrics in the room. So I came up with a 10 minute solution to make us both happy.

The "Bustin' Out" pillow cover!


Here's how I did it.

I cut a square of fabric, large enough to cover the front of my pillow form with a 1/2" seam allowance.


I then cut that square in half and hemmed the inside edges with a 1/2" seam.


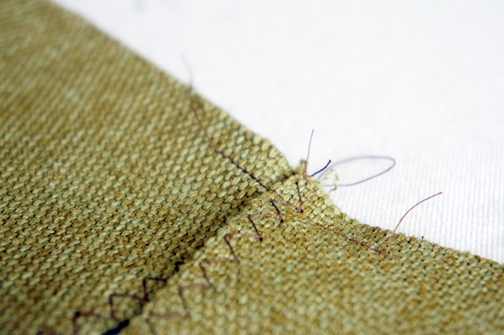
I used a zig-zag stitch to give it a more decorative finish.


I overlapped the inside hems by 1/2" and basted into place.


I then cut the back panel for my pillow and sewed the front and back together (right sides together!).


I clipped my corners and turned the cover right-side-out.


I stuffed my old pillow in and called it done!


You'll notice that I altered my seams a bit on the top and bottom of the pillow. I used a narrow hem on the sides, but increased my seam width to give the pillow cover a tighter fit. I wanted it to appear as though the inside form was busting out of the cover.


Ridiculously simple and even my husband was impressed! He couldn't stop smiling - which is a really weird reaction to have about a pillow.

{I guess the previous state was really just that bad!}