Showing posts with label scraps. Show all posts

I had a rude awakening this summer.

"Mom, I want a pair of aviator sunglasses. Because they're cool. And because directors wear them."

{What?! Who is this little man and where is my baby?! When did he start to care about "cool?!"}

So, we scoured the entire mall to find the perfect pair and came out victorious by the little guy's standards. And he wears them. All. The. Time.

Fast forward to this past weekend... as I was cleaning up my flannel sheet scraps from my bean bag project, I was inspired to create a soft sunglasses case for his prized pair.

Look! Half of the work was already done for me! Here's the how-to.

Take a 9" x 9" square scrap, including the edge hem on one side. This will be the drawstring casing!


Cut the edges of the casing at an angle.


Fold the square in half, right edges together.


Sew a 1/2" hem down the long side and the bottom. Be sure to back stitch the beginning and end of your seam. I surged my edges, but this isn't necessary. This fabric doesn't really fray.


Turn the case right side out and insert your drawstring. I found a piece of leather to use as my drawstring. I added a wooden bead to cinch it tight.


Such a super easy and functional project! The soft fabric can be used as a cleaning cloth, too.


In closing, we'll leave you with our best "tough guy" faces...


Good grief. He looks like he's had practice. I look like an angry Elvis impersonator...

So, I finished up my classes this week and it feels ahhh-mazing!!! I have one huge paper ahead of me to complete in the next eight weeks, but that seems totally do-able when I look back at how far I've come.

I just can't wait to begin tackling all of the things on my creative to-do list!!!!!!!!!

Dylan has been asking me if we were going to decorate at all for Halloween. Honestly, I probably wouldn't have done anything beyond a jack-o-lantern, but he seemed so interested. I couldn't say no.

So, as a first step, I threw together a little bunting for the mantel and it's so cute.

Here are the fabrics that I used - all remnants from past projects.


And, some leftover pom-pom trim...


I cut a bunch of 1.5" x 12" strips from my fabrics.


I folded them like this...


And fed them through the loops between the pom-poms.


The fabrics were a bit frayed, but I thought it added to the character of the bunting. I trimmed off a few long strings and snipped the ends.


I added a few googlie eyes to make little ghosties out of a few pom-poms. So cute!!


The bunting now adorns my mantel, but it definitely needs something more...


And now that I have a little more time on my hands, who knows what I might come up with?

Have a great week ahead!!


So, my two week break has come to an end. My coursework resumes tomorrow and I'm just not ready!!

I have really made the most of this little break between classes. I've posted my to-do list to the right of this post and you can see how much progress I've made.

Woo-hoo!

Today, I was thrilled to host a great group of sweet friends - both old and new - for a fun afternoon, full of crafting goodness. We raided my scrap stash to make pretty headbands.


After teaching the girls a few fabric flower techniques, they were off and running!


Crafting is not without risk! There were a few casualties with glue guns... I was reminded of the saying, "I craft, therefore I have no fingerprints."


I absolutely love how everyone found a way to express their own unique style through their creations.


I just love these girls! We've already planned a project for our next get-together in July. Can't wait!!


I hope you had a lovely weekend, too! I'm off to hit the books!
Graphic design is a major part of my professional life. However, in marketing, you're usually tied to a certain set of objectives - branding, graphics standards, a particular look and feel.

So, the idea of subway art has always fascinated me. It seems so freeing...

{You mean, I can use any words that I want, any font that I like, in any pattern that I wish? Shut the front door! That's awesome.}

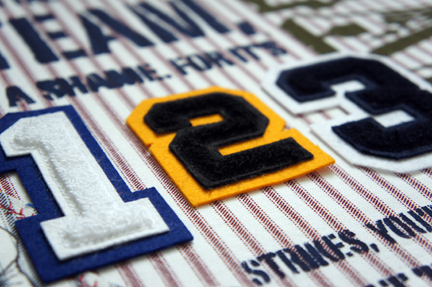
So, I decided to experiment with a few different techniques to create an art piece for Ryder's room. I was also eager to put my sports letters to good use and this seemed like a perfect opportunity.

For this project, I used:

  • 1 18"x24" canvas
  • Scrap fabric (a piece large enough to cover the canvas and a smaller piece to run through my printer)
  • Clear Contact Paper
  • Acrylic paint
  • Sports Letter Appliques
  • Mod Podge
  • Fabric glue

I started by laying out my design (to scale) in Adobe InDesign.

{Feel free to download for your own use.}

I found this vintage baseball graphic at TheGraphicsFairy.com.


I covered my canvas with fabric, adhering with Mod Podge.


Next, I began work on a set of stencils. I converted my artwork into a format that I could trace with my Silhouette software. I exported my file from InDesign as a JPEG.

I traced the artwork, which meant working with a couple of different Silhouette studio files. Because my layout is so large, I had to break down my design into pieces that could be cut with my Silhouette.

{If you would like these .studio files, I'm happy to share! Just e-mail me at rachelhgarza{at}gmail{dot}com.}

I cut the stencils out of clear Contact Paper (trimmed to a size that would run through my machine) and laid them out on my fabric-covered canvas and sponged over the letters with acrylic paint. I wanted the letters to look worn and rough so I used a minimum amount of paint on my sponge.


I've been looking for a reason to try printing on fabric so I decided to make a patch out of a different ticking fabric. I ironed my fabric onto Craft Bond, trimmed to size, and had no trouble running the piece though my inkjet printer.


I used a decorative stitch, reminiscent of a baseball's stitching, to frame around the image and trimmed the excess fabric away. I adhered my "patch" with fabric glue.


If I had it to do over again, I would have used a different fabric. In my mind, these patterns should line up perfectly when layered on top of one another... but this is real life...


I left space in my layout to incorporate a few sports letters. Once I finished painting, I adhered the letters with fabric glue.


Here's the end result.


It's not a terrible first attempt. I'm definitely going to use it in the room. However, I'm not wild about the mix of vintage lettering with more modern appliques.

It was a great learning experience and I'm inspired to do more! I have a few ideas for more subway art for the boys' playroom. So... who knows what I'll have to share in the coming weeks...

Hey! I have an extra baseball fabric print that I made, but didn't use. If you would like it for your own project, leave a comment below. I'll select someone at random next Friday to send it to.
Hello, friends!!!

I survived my first semester of grad school! I finished class this past Thursday and I couldn't run fast enough back to my studio... just to sit there... and sigh with relief.

Actually, first, I ran to Michael's. No kidding. I needed retail therapy.

Here are a few of my fun finds.


Needless to say, my creativity was overflowing this weekend!

As usual, I've been planning to make a few of my Christmas gifts for friends this year. In preparation, I ordered a substantial collection of glass tiles and findings from Sun and Moon Craft Kits a few weeks ago. It's been taunting me ever since.


So, yesterday, I wasted no time in getting started with my gift-making merriment!

First on the list: JEWELRY!!!

I used a sheet of glittered card stock for a very glamorous set of earrings with a matching pendant for the most glamorous person I know, Megan of Maison.


I used the glaze that I purchased from Sun and Moon to coat the back of my glass tiles. I then laid the tiles directly on top of the sheet of card stock and let them dry for several hours.

For my second set of jewelry, I wanted to use some vintage fabric from my collection. Before adhering my tiles, I ironed some applique interfacing to the back of the fabric to ensure the edges wouldn't fray.


Once dry, I cut around the tiles and trimmed the excess card stock (and fabric) from around the perimeter of each tile.


I then added another layer of glaze to seal the back of the tiles and allowed it to dry overnight.

Once dry, I added my findings.


I absolutely love, love, love the way these turned out! I especially love the vintage fabric. I can't wait to make more!

Come back tomorrow to see more fun with glass tiles!


Pin It