Showing posts with label Made for Mermaids. Show all posts

Confession time…

My guilty pleasure is 90’s alt/grunge music. I know it’s mostly angst-filled, immature, and largely out-of-tune, but it is totally my jam!!

So, when my sweet guy texted me to ask if I’d like to go to a Bush + Live concert, those giddy, teenage girly butterflies filled my stomach and I turned the music up a little bit louder!!


Naturally, I’ve been thinking about what to wear. What does a middle-aged-woman-who-wants-to-relive-her-glory-days-without-being-inapproropriate wear to a high-octane concert??

Thank goodness that Made For Mermaids totally had me in mind when they released the Clueless Collection last fall. I’m sure it’s because they knew I would need a retro-tastic bodysuit, right?


As always, the Women's Tai is a bodysuit pattern loaded with sleeve and neckline options. You can even make a top if the bodysuit doesn’t appeal to you.

I’ve made a couple of bodysuits in the past year and I still can’t seem to get the snaps quite right. However, the Women’s Tai is the perfect bodysuit pattern! You just step in, pull it up, and go. No snaps required!


This pattern comes together very quickly and would be a great primer for anyone who might be scared to make lingerie or swimwear. All-in-all, it took me about 1 ½ hours to make... but I’m slow and easily distracted.

I used a perfect camo tri-blend from Surge Fabrics and finished the leg openings with a picot elastic trim, also from Surge. You could just as easily use regular knit elastic or even use a band to finish the legs. I’m sure I’ll make another and will likely experiment with leg bands next time. I’m interested to see how different it feels during wear.


This pretty will get a lot of use this summer! The best thing about modern fashion is that anything goes, really. While this bodysuit is 90’s-inspired, it is completely on-trend today.


And now… I’m ready to rock... at an outdoor concert... in the July heat!
After all of these years of making, I have never sewn a costume for myself. I've just never had much of a reason to dress up on Halloween or for any other event. However, this year, my brother nearly had me convinced to attend DragonCon in Atlanta. I wasn't able to attend, but the invitation started my brain thinking about creative costumes.


I'm personally much too practical to invest my time and energy into garments that can only be worn once or twice per year so I began searching for ideas that I could incorporate in my regular routine.

That's when I remembered Pearl, from a Cartoon Network show called "Steven Universe." My kids used to watch it... I have no personal affinity for the show or the character. I felt, though, that her character could easily translate into multifunctional additions to my own wardrobe.


{Not only that, her character seems pretty high on anxiety... she may actually be modeled after me!}

All I needed to sew was a cute peplum top and a pair of tangerine shorties. I matched it with a pink wig and socks, both purchased from Amazon, and attached a little yellow felt star with double-sided fashion tape.

I made the top by mashing together the Made for Mermaids Mama Fiona and Mama Joy. I gathered the peplum, rather than pleating. I self-drafted the funnel neck by increasing the neck binding by three times the width of the pattern.


I used a dreamy circular knit from Phee Fabrics for the top. It was my first experience with the fabric that everyone adores. And, I have to agree, not only does it feel amazing, it worked up like a dream. It is the perfect fabric for activewear and daily wear alike!


The pants I'm wearing here are also me-made... Vogue 1517 by Anne Klein. These pants really deserve their own post. MAJOR learning curve to share!


For the shorties, I used the Patterns for Pirates Peg Legs pattern and lengthened the inseam by two inches. I actually made these twice... the first time with a gusset. And, holy moly! The fit was so terrible on me that I was embarrassed to look at myself in the mirror. Thank the sewing gods that I had just enough fabric to complete a second pair - sans gusset!


I used a gorgeous nylon/spandex tricot in tangerine for the shorties. This is the perfect performance fabric! As a runner, I will definitely get a lot of use out of these cuties! This was my second project using tricot and it won't be my last! Word of advice when making these shorties with tricot - size up, ladies! This is a compression fabric.


My last accessory was my very own little Steven Universe. He was super excited to channel the energy of his character and decided that bubbles were a must have in our quick photo shoot.


I really couldn't be more pleased with the outcome of this month's sewing challenge. I loved the opportunity to think creatively about how to assemble a costume that will blend into the everyday.

And, who knows, it may get to make an appearance at DragonCon 2019.

What's on your cutting table for Halloween this year? Please tell me all about it!


Years ago, I joined a healthy living/weight loss challenge at work. The organizer knew me personally and was short on team leaders so she asked me if I would lead a group.

{I have a hard time saying "no."}

Within one minute of meeting with my team, one of the ladies asked me what my qualifications were to lead the group.

Once I recovered from being put on the spot, I confessed... None. I had zero qualifications. She was greatly displeased...

So, here we are today to discuss making underwear and I confess to you - I have precious little "expertise" in making undergarments! But I can sew and this is truly a super simple make. Two pattern pieces... a bit of elastic and lace... and voila! You have a pretty perfect pair of underwear!


{This is me... wearer of underwear, but neither expert maker nor model of underwear. You get flatlays today. Haha!}

I was part of the testing group for the Made for Mermaids Mama Vicki pattern and had a great time trying out different ways to customize the pattern. While they are all hipster-style briefs, it offers high-, mid-, and low-rise options. I'm going to show you a few different ways to dress them up, using the low-rise style.

The pattern directions are incredibly simple to follow so I won't be sharing a step-by-step for making the garment itself.

Lace

For these two versions, I used Phee Fabrics' rayon spandex. Rayon spandex is the softest, silkiest, dreamiest knit fabric I've ever worked with. It makes an amazing pair of underwear!


I was inspired by my favorite style from Soma Intimates and decided to add a pretty lace detail to the front.

There is no right or wrong placement of the lace detail, but you want to make sure the sides mirror one another. I measured in 3.5" from the top edge and 3" from the leg edge to ensure identical placement.


I attached the lace with a small zigzag stitch and trimmed the top and bottom to match the curves of the garment.


The pattern instructions direct you to add the trims - be it picot, lace, or standard elastic - and "join" them in the side seams. Here's how that process looks:


Stretch the lace to fit the length of the entire leg opening!


Then, sew up one side of the brief. Repeat the process with the waistband elastic. Sew up the second side of the brief.

And here's why I don't like this method...


It's tough to match up the fabric and trim. However, if you look at any of your RTW undies, you'll see the same method used.

I prefer to join in the round - meaning sew a circle from your trim or elastic and attach once the brief is already assembled. It's a little more work, but it makes for a much cleaner look. That's what I've done with this pair.


I'll demonstrate joining in the round with my next pair.

Once you've attached your lace, you'll want to trim your fabric to match the curve of the lace.


I love these!!

Fold-over Elastic

Fold-over elastic (FOE) is a great way to finish the edge of an undergarment. It's very easy to work with! Just fold over and sew with a zig-zag stitch.


I really "went fancy" with this make and added some wide lace to the sides. To do so, I basted the edges of my briefs together.


I then attached the lace by lining up the center of the lace with the side seam and sewed the edges with a zig-zag stitch.


I trimmed the lace to match the curve of my brief and then cut out the fabric behind the lace.


I prepped my trim for joining in the round by sewing the seam allowance of my FOE to create a circle... Matched the quarter points of my brief with the quarter points of my FOE...


Then attached with a zig-zag stitch.


So simple! And such a clean look all around.

Mixing Fabrics

I consider this fabric match both a win and a fail.

I swore I'd use every scrap of my beloved oatmeal rayon spandex from Phee and I had just enough left for a front panty panel. I paired it with Phee's camo powernet and did a simple black picot elastic trim.


The pair didn't photograph very well, but I decided to share anyway! They aren't as wonky as they appear here.

Why a win? Talk about lift, ladies! Powernet is as awesome for lifting the backside as it is the girls...

Why a fail? Size up when using powernet. This experiment resulted in a VERY cheeky pair of briefs, which I will totally wear, but will definitely be sizing up for my next pair!

I think the biggest lesson that I've learned in prepping for this panty party is that it's okay to experiment with different design ideas when you have a winning pattern. And panties are the ULTIMATE use for leftover scrap fabric. When I think about how much I've spent on underwear in the past, it's exciting to know I have the ability to make a better fitting garment with supplies I already have on hand.

Now, I just need a bigger underwear drawer...
Does it seem to everyone else that the stuffy days of suits and pantyhose in the workplace are falling by the wayside? I know opinions about this vary, but I ab-so-lute-ly love it.


I've recently transitioned from a more "buttoned-up" workplace to one that allows me to dress for the day ahead. If I'm meeting with clients or representing the company, I tend to dress more traditionally professional. If I'm attending a community event, I dress for photos. If I'm planning to sit at the desk and slog through a mountain of work, I'm dressed for total comfort.

And jeans or leggings on Friday... lawd... I love my Friday leggings.
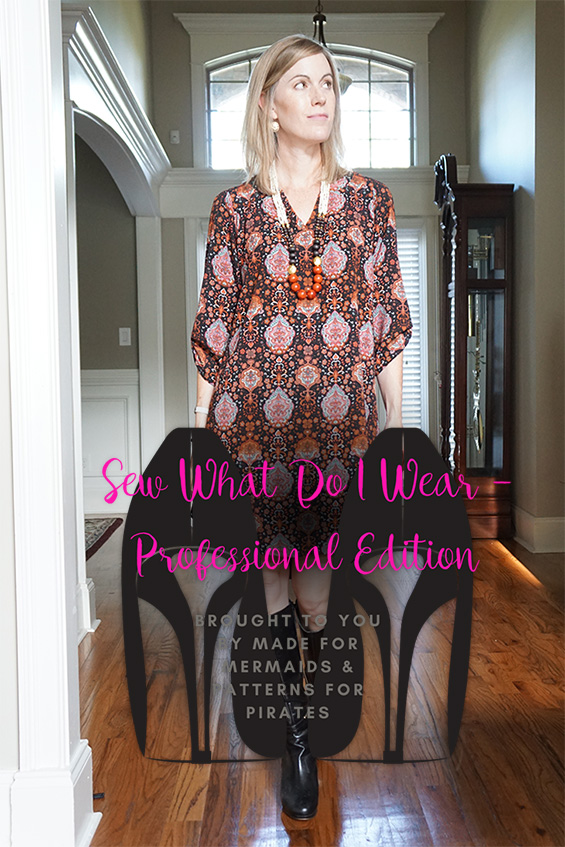
My current obsession with sewing knits lends itself nicely to this shift in the work-uniform dynamic. I can create pieces to dress up or down depending on my needs. And I never, ever sacrifice comfort!

That's one of the reasons that I'm in love with the full suite of patterns from Made for Mermaids and Patterns for Pirates. They are all designed with those must-haves in mind.

First up is the Patterns for Pirates Everyday Elegance dress... How beautiful is this dress??


(all the heart eyes is the perfect reaction!!)

It is full of little details that make it so special - yoke pleating, gathers at the shoulders, a buttoned tab sleeve... and such an easy make! I'll admit that I may have had to make it twice because of lazy poor  construction decisions... costly mistake but it was worth doing over again!


If you've been following the tour all week, you may recognize this perfectly fall-ish ghost crepe from Vinegar & Honey. While a departure from my knit-kick, it was the ideal woven for this silhouette.

Next up is a total comfort look - the Made for Mermaids Mama Joy with the Patterns for Pirates Cocoon Cardigan.


I made the dress to wear during the warmer months and paired it with this amazing cardigan for the recently cooler weather. You could literally whip both of these garments up in an evening. They are both such easy makes. Perfect for beginner and seasoned makers alike!


And... how can you go wrong with sweater knit and double-brushed poly? I snuggled all day in this outfit and it was work appropriate! Win-win!! The sweater knit is Girl Charlee and the DBP is Knitpop.

(I could seriously live my entire life in DBP... it's that ridiculous.)

And, finally, a winning casual Friday look. To be honest, I'd probably wear this gorgeous outfit during the work week, too. Actually, I did. On a Thursday. It's got all of the scandalous parts covered, right?


This cardigan is the newest Made for Mermaids release, the Mama Darcey. I've paired it with the Mama Courtney (sans knot) and the Patterns for Pirates Peg Legs. All SUPER easy makes and separates that can work in any number of outfits.


Holy moly... I love this sweater. I'm wearing leggings and knit from top to bottom and I feel GLAMOROUS!!!


You can find this sweater knit and wine cotton spandex at Girl Charlee and the distressed knit at So Sew English Fabrics.

I hope you've enjoyed our week of work wear during this blog tour! Which garments do you plan to incorporate in your professional wardrobe? If you've missed any of the days, you can find the posts here:

Day 1  |  Day 2  |  Day 3  |  Day 4  |  Day 5

Now, bring on the weekend!

XXOO
Admittedly, I'm easily impressed. However, it takes a lot to knock my socks off.

Earlier this year, I discovered PDF sewing patterns and had that moment of, "Holy. Cow. This is freakin' genius!" One file... every size you could ever need... yours to print as many times as you'd like... and, I'm soooo late to the game!

Needless to say, I've been making up for lost time and have quickly fallen in love with a few designers. The sisters behind Made for Mermaids and Patterns for Pirates have quickly captured my heart. Their designs are timeless, easy, and packed FULL of options. If you've never used PDF patterns, these ladies have generously provided a few free patterns to get you started (and they are pretty fabulous!!).

It was a magical moment for me when I was invited to test the newest addition to the Made for Mermaids collection - the Mama Kourtney.


The pattern features options for tops, tunics, and dresses in sleeveless, short- and long-sleeves. There is even a girls' pattern!

I'm still blissfully living in my "leggings are pants" fashion world so the sleeveless tunic was a perfect match for my current lifestyle. Not to mention that it's still a bajillion degrees here in the south.


I used a cotton rayon blend from Girl Charlee that had just the right amount of drape. I think the tiny flower print gives it a great vintage vibe.

Overall, this make couldn't be simpler. From cut to hem in less than an hour! That is, if you don't sew the arm binding to the neckline and the neck binding to the armscye. With a serged seam. And solidly impale your finger with your seam ripper. Then, it might take you a few hours longer.

Don't sew when you're exhausted, friends. Just don't do it.

The feature that elevates this pattern is the sexy little hemline knot. Looks complicated. Is actually super simple. The directions are very easy to follow and Megan provides the perfect video to make it even simpler.


Made for Mermaids patterns are color-coded, rather than sized with traditional numbers. I cut a pink for this top and made no alterations. It's a little large for my taste under the arms so I will likely take it in a bit for my next make.


You can download this essential pattern here. It's on sale separately and part of a bundle with the girls' pattern.

Grab your pattern today and be sure to share your makes with me! Happy sewing!!