Showing posts with label furniture. Show all posts
I've written before about my affinity for "Grow With Me" nursery themes. I mean, you put so much into a baby's special space... it's nice to see it work a little longer!

I chose vintage cowboy decor for my oldest son and vintage baseball for the younger. Well, it's been nearly nine years for the older, four years for the younger, and we're still rockin' most of their original nursery character.

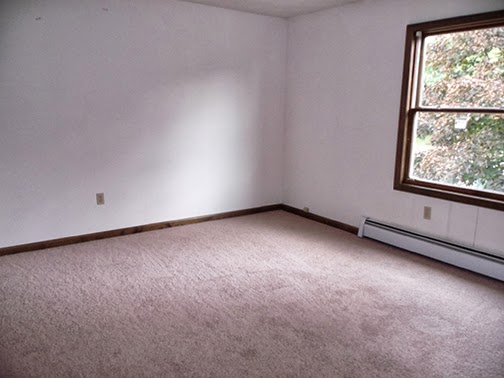
The picture below is my youngest's room in the new house - pretty typical of the rest of the house. Terrible carpet, bad paint, no lighting.
 

And, here's his room today! A few coats of paint, lighting, new carpet, 2" wooden blinds, and it's now a warm and cozy room for the little tyke. The bedding is a Tommy Hilfiger steal that I found on Overstock.com. It's a comforter set paired with a denim bed skirt.


Remember my subway art project? It greets visitors as you enter the room.


We installed a new closet system to be multi-functional. It's fantastic, but not inspirational to look at so we'll just keep the doors closed for now...


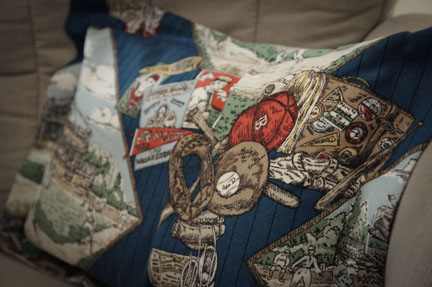
I made a simple bolster pillow with leftover nursery fabric and my sports letter appliques.


My penny-punch art project is hanging proudly on the wall.


And the furniture... can we just chat about this furniture for a minute? We left the nursery furniture behind when we relocated to Pennsylvania and we were in the market for something with longevity. We were so excited to find an Amish furniture store in our local area. We ordered this set and anxiously awaited its arrival for months.

It could not be more perfect - it's simplicity, amazing craftsmanship, beautiful wood... this is a set that will be with us for the rest of our lives.


I seem to end each of these posts with the same closing - we have really come a long way toward making this house a home. I absolutely love it.

We're embarking on our biggest DIY project yet - the master bathroom.

Hope we don't get flushed away!


Our second guest bedroom is lacking an identity.

Ultimately, I'd like it to have a more masculine feel. I especially LOVE this Swiss Army blanket-inspired room that Cooper Boone featured on his blog, "Cooper's Table."


It's strong, masculine, and... simple!

As a start, I've set up a full-size bed with a few accessories. I guess you could call it, "The Land of Cast Off Furniture."

I sorted through all of the bedding that we've accumulated over the years and found a queen set that will temporarily fit the bill - until I gather my thoughts and inspiration for the space.

I thought I'd share with you how I adjusted the queen bedskirt to fit the full bed. It's a no sew solution that is completely non-committal!

Does it get any better?

Here's the before.


Continue to pinch, fold, and pin the fabric down the length of the skirt.


And here's the after!


It's now a perfect fit!

This solution worked especially well with this style of bedskirt. The gathers help to disguise the folds at the foot of the bed.

I hope this is helpful! I'm always eager to use what I already have on hand. I was so pleased to customize the fit without sewing a seam!

I hope your week is off to a great start!


Miss Dixie of DixieDIY.com contacted me a few weeks ago to ask me to write a guest post for her blog while she takes a much deserved vacation. I was thrilled and so honored that she asked me!

Unfortunately, I had to have a bit of unexpected surgery and missed the deadline to get everything to her. And I feel terrible about that, Dixie! I am sorry to have let you down.

So... I'm posting this little project here today, but would love it if you took a few minutes to visit Dixie's awesome blog for a little fashion DIY inspiration. She's a truly amazing seamstress.

I get so excited when I “shop” my fabric and supply stash and discover new ideas for things I already own. Isn’t that the best feeling?! And that's where I began with this fun chair re-do.

Allow me a moment for backstory…

{Cue music…}

There was a time that I aspired to be a nursery designer. I had the good fortune to work with friends and friends-of-friends to create special spaces for their little ones and it brought me such joy! Thinking it would be a great source of "play money," I jumped in and invested in a lot of really great materials.

After a couple of years, my enthusiasm waned and I began declining custom jobs. It proved to be a burden of stress lifted from my shoulders, but to this day, I still have tons of supplies cluttering my storage spaces. Take a look at this roll of bumper batting…


{Wait. I’ll say it for you… Holy cow! That’s a lot of batting!}

I’ve sold some and given some away, but there is still so... much... left. I have 5 rolls of this in storage. I’ve come up with some fairly creative uses for it. Such as…

This massive bulletin board:


And… these pot holders:


And… the chair makeover that I’m sharing with you today – redone entirely with materials that I already own.

I salvaged the chair from a university that was replacing old classroom furniture. What a find! Here’s the before:


Materials and tools used for this makeover:
  • Scrap fabric 
  • Bumper batting 
  • Hot glue gun/glue 
  • Staple gun/staples 
  • 1 ½ inch cover button 
  • Leftover nail head trim 
  • Sewing machine/Thread 
I cut the batting to fit the back of the chair and adhered in place with hot glue.

I cut a piece of fabric large enough to “upholster” the padded chair back. I tucked the edges in ½ inch all the way around (to hide the raw edge) and stapled into place.


I determined the dimensions for my skirt by measuring the sides and front of the chair and the length from the seat to the floor. I added extra width to accommodate side hems (1/2” each) and corner pleats (2” for each corner) and extra length to accommodate a top and bottom hem (1/2” each).

I sewed my side and bottom hems and pressed the top down by ½”. I then stapled the fabric to the chair by securing the top hem, forming my pleats as I worked my way around with the staples.


I then finished off the chair back and skirt with nail head trim.

And… here’s the after!


Isn’t it precious? I love the use of ticking because this chair can be used in feminine or masculine settings. I can use it in my boys’ rooms or in my guest room or in my studio. Gotta love multi-purpose furniture!!

Any ideas for more fun projects to use up my endless supply of bumper batting?
I've walked past this little cart about one million times since moving into our house last July.


It's been hanging out in the garage, collecting junk for our eventual yard sale. We've had it for 10 years or so and it's been through a lot.


The dog used it as a chew toy... cleaning supplies have leaked on it... there have been many generations of spiders birthed beneath it's wooden slats {shudder}...

Yep. Yard sale material.

However, I walked past it last week and it was like a light bulb came on. Eureka! I could paint her up and use her to store my sewing machines.

And I did just that.

I had the cart. I had the primer. I had the paint. Score for zero investment!

Painting this cart took FOR.........EV..........errrrrrrrrr.


But, I'm the lazy sort of painter that starts out really excited and then loses interest after about 15 minutes. {Truth.}

I thought it would be a grand idea to paint outdoors while the weather is so mild! Apparently, the bugs thought it was a pretty grand idea, too.


Two coats of primer and two coats of paint later, here she is.


I had the notion to do some creative finishing touches, but I was so glad to get that last coat of paint on that I called it done.

I did make a yo-yo knob cover to dress her up just a bit more.


I'm super-pleased with this zero-cost makeover that helped to meet a need in my studio.

Well, I'm not finished yet, but I wanted to share a quick update on the kiddos' creative space.

Remember the before?


Here's where we are today.


I can't tell you how many times this week that my oldest son has disappeared - only to be found furiously drawing and coloring in his revamped space.

{Success!!!}

A friend of mine gave me these GREAT "old school" student desks - two of them! They are covered with years of graffiti {which my oldest son wants left unchanged, but I don't know about that}! I'm brainstorming ideas about how to refinish them so please add to my list if you can!!

I was able to utilize the existing little art table to create another art nook for playdoh (see it in the background?).


I still want to jazz up the wall a bit. My March Winds Wreath just isn't cutting it.

Maybe another art display piece? Small bulletin boards?

Hmmmm....
I am finally making progress on my playroom/studio space! I ordered the fabric ages ago and it's been staring at me... for ages... wondering when I plan to use it.

Do you remember my grand plans for the room? The challenge is to create a space that works for me (girly!) and my boys (definitely not girly).

It's a challenge.

I am happy to report that Project #1 is complete! Toy storage bench cushions!

They can be used as floor pillows, too. {Bonus!}

This is the third time that I've made over these cushions and each time, they get better. They do! That might mean that I've learned a few tricks along the way.

All you need is three pieces of fabric and foam.

Use this simple equation on the diagram below to figure out what size to cut your fabric pieces. Join all three pieces together, end to end, with the pieces aligned in the center (see sketch).


My finished cushions measure 39" wide (W) by 21" deep (D) and they are 3" tall (H).


Begin your line of stitches 1/2" from the edge of the fabric and use a 1/2" seam.


Be sure to backstitch each of your seams. I'd be the first to tell you if you could skip this step, but it's really important for this project.

Turn the ends of your stitched panels 3/4" toward the inside of your pillow cover and stitch into place.


Clip into the selvage of your middle panel, just shy of the seam.


That way you can turn your fabric to start creating a boxed corner for your pillow. 

Stitch in place, stopping 1/2" from the edge.


Repeat for the other corners.

Clip the long edge just shy of the seam.


Pivot and sew the long edges into place, sewing past the hemmed end (be sure to backstitch!!).


Finish one side of your pillow before stitching the other end into place. This will help you to form the envelope flap in the back.


This is how your boxed corners should look before you turn the cover right-side out.


And here's how your corners should look once you've turned the cover right-side out and added your foam inserts.


Okay. So, by now you know that I always search for the more economical route. 

*smile*

I wanted a 3 inch cushion with a soft top, but good foam is EXPENSIVE! Here's how I achieved my desired height.


And here's the finished result!


I hope I did an accurate job of explaining the "how to." It really is one of the simplest sewing projects you'll ever attempt. Promise!

If you have any questions, please do not hesitate to contact me.

Now, on to window treatments!
I’ve been working to finish setting up Ryder’s nursery {can I still call it that?} and, with every box I open, I’m so excited to be reintroduced to my past projects!

For both of my boys, I designed rooms that could grow with them. Dylan’s theme is vintage cowboys. Ryder’s is vintage baseball. At any point, I can make very small changes in their rooms to adjust to their ages or changes in preferences. It’s great!!

Let me give you a quick tour.

I started with a fabric that I loved and complemented it with a red ticking. I’ve long since retired the bumper, but the crib skirt will stick around for a while. I actually have enough of these fabrics to make a cute duvet for his toddler bed.


{Don’t you know the only time I can get a decent photo of my child is when I’m trying to take a photo of something else?!}

Rather than making custom treatments for his room, I purchased navy tab-top curtains and added bands of the main fabric.


I found these really great vintage penny-punch cards on eBay. They were a GREAT find {and in mint condition}! I slapped them in floating frames and… Voila! Instant art!


I purchased this dresser for $35 at an antique store. I stripped and stained the piece a dark brown and applied a crackle finish in a navy blue over the stain. I also swapped out the pulls. I LOVE the results!


I used scraps to make a fabric bunting and a few throw pillows.


I love maximum impact on a minimum budget. Don’t we all?!

Please come back tomorrow! I want to share a window treatment project that I’ve been helping a friend with this week – during our lunch hours! Gotta squeeze in the creative time whenever you can!