Showing posts with label Silhouette. Show all posts
I knew this day would come eventually.

The day my son would come home with his first... science project.

As I read the assignment, the cold sweat and mild anxiety attack may have given my true feelings away. My first thought was to schedule a meeting to gain deeper insight into his teacher's methods and desired outcomes. What if we misinterpreted the assignment?!

{Can you tell that I've recently graduated with my M.Ed?}

But... this is the third grade. And, the written assignment did say a poster was appropriate.

{Okay. Let's do this.}

Despite all of the worry, my son and I had the best time working on this! We researched together. We shopped for supplies together. I taught him painting techniques and how to use Adobe InDesign.


And, our end result was fantastic!


Hmmm... one might say, "Out of this world!"

Sorry, couldn't help throwing in the bad pun...


My Silhouette came in handy for this project, too. We made the labels from silver adhesive vinyl.

I'm still a teensy bit anxious about him turning this in—just as though I was back in school myself! I know his assignments will only get tougher as he gets older.

{sigh}

Let's hope they are all as much fun as this one was!


Y'all.

It was -12 degrees, with a wind chill of -34, when I woke up this morning. It is so cold it physically hurts! Have you felt the effects of the "Polar Vortex of 2014?"

Meh. Everyone is talking about the cold... so, let's talk about crafting.

It was really no surprise when my nearly-four-year-old began asking for a "shark cake" for his upcoming birthday.

Not a superhero theme... not cars... not dinosaurs... sharks.

He doesn't make anything easy on us.

{wink-wink}

So, I set to work this weekend, crafting shark accessories for the cupcakes that he was taking to share with his classmates.

I found the perfect scrapbook papers at a local craft store - a shimmery gray for the shark toppers and a watery iridescent for the cupcake wrappers.


This is one of those times that I said a prayer of thanks for my Silhouette. I downloaded patterns for the sharks and the cupcake wrappers from the Silhouette store and set to work.


My Silhouette is an older generation, but I still love it! Here it is in action.


And, the end result...


To make the toppers, I "sandwiched" a toothpick between two sharks. Time consuming, but so simple.


I think it looks as though they are leaping from the surf with the fluffy white icing.

He was happy as can be to share the cupcakes and shark water squirter favors with his classmates today!

Score one for mommy.

Wherever you are, stay warm and dream of cupcakes. Even better, bake some and take advantage of that warm oven.


Okay. You may be better off not knowing this about me, but I'm sharing anyway.

I have a security blanket in the form of a bright pink fluffy robe. Once I get home in the evenings, we rarely part company. We bonded during my last pregnancy and I just can't let go!

{Hang with me... I'm going somewhere with this.}

My studio has a window that faces the road and I've left it uncovered (no blinds!) to this point to take advantage of all the great natural light. The downside of that means that anyone driving by can see straight in at night and likely believes my home is occupied by a hot pink yeti.

So... yes... a little privacy is in order. Not just for my sake, but for my neighbors, as well...  and my children who have to go to school with their children... the list of those affected could go on and on!

{My Solution}

I used my Silhouette to cut this pattern out of frosty Contact Paper to create a pretty, privacy screen of sorts.


It was time consuming. I had to cut one shape at a time because Contact Paper does not cut the same way that a roll of Silhouette vinyl does. It's thinner and the blade cut right through the paper backing in several places. I then had to place each shape by hand. Transfer paper wouldn't work for this project.


Once placed, I used an Xacto knife and ruler to trim around the edges.


The addition of a single panel allows for natural light during the day and total privacy in the evenings.


I'm fairly pleased with the results. A good solution for a problem that clearly carries such high risk!

And all because of my bright pink fluffy robe.
Graphic design is a major part of my professional life. However, in marketing, you're usually tied to a certain set of objectives - branding, graphics standards, a particular look and feel.

So, the idea of subway art has always fascinated me. It seems so freeing...

{You mean, I can use any words that I want, any font that I like, in any pattern that I wish? Shut the front door! That's awesome.}

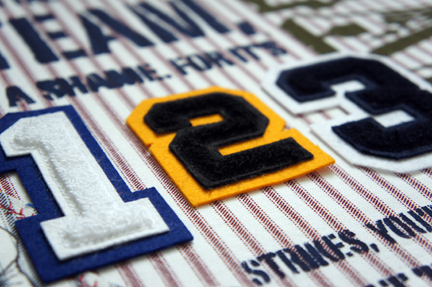
So, I decided to experiment with a few different techniques to create an art piece for Ryder's room. I was also eager to put my sports letters to good use and this seemed like a perfect opportunity.

For this project, I used:

  • 1 18"x24" canvas
  • Scrap fabric (a piece large enough to cover the canvas and a smaller piece to run through my printer)
  • Clear Contact Paper
  • Acrylic paint
  • Sports Letter Appliques
  • Mod Podge
  • Fabric glue

I started by laying out my design (to scale) in Adobe InDesign.

{Feel free to download for your own use.}

I found this vintage baseball graphic at TheGraphicsFairy.com.


I covered my canvas with fabric, adhering with Mod Podge.


Next, I began work on a set of stencils. I converted my artwork into a format that I could trace with my Silhouette software. I exported my file from InDesign as a JPEG.

I traced the artwork, which meant working with a couple of different Silhouette studio files. Because my layout is so large, I had to break down my design into pieces that could be cut with my Silhouette.

{If you would like these .studio files, I'm happy to share! Just e-mail me at rachelhgarza{at}gmail{dot}com.}

I cut the stencils out of clear Contact Paper (trimmed to a size that would run through my machine) and laid them out on my fabric-covered canvas and sponged over the letters with acrylic paint. I wanted the letters to look worn and rough so I used a minimum amount of paint on my sponge.


I've been looking for a reason to try printing on fabric so I decided to make a patch out of a different ticking fabric. I ironed my fabric onto Craft Bond, trimmed to size, and had no trouble running the piece though my inkjet printer.


I used a decorative stitch, reminiscent of a baseball's stitching, to frame around the image and trimmed the excess fabric away. I adhered my "patch" with fabric glue.


If I had it to do over again, I would have used a different fabric. In my mind, these patterns should line up perfectly when layered on top of one another... but this is real life...


I left space in my layout to incorporate a few sports letters. Once I finished painting, I adhered the letters with fabric glue.


Here's the end result.


It's not a terrible first attempt. I'm definitely going to use it in the room. However, I'm not wild about the mix of vintage lettering with more modern appliques.

It was a great learning experience and I'm inspired to do more! I have a few ideas for more subway art for the boys' playroom. So... who knows what I'll have to share in the coming weeks...

Hey! I have an extra baseball fabric print that I made, but didn't use. If you would like it for your own project, leave a comment below. I'll select someone at random next Friday to send it to.
My oldest son is an excellent artist. He's displayed talent since he was just a tot.


{I'm a proud mama... Can you tell?}

I've never had a good way to showcase his masterpieces. I always intend to frame them or scan them for some massive future display project. But there's just never enough time (or money) for that.

One of my major problems is our refrigerator. It's big and beautiful and stainless steel. Not magnet friendly.

So, during my break, I was determined to complete an art wall.

Here's the before.


My first step was the magnetic board. I picked up a basic board at IKEA and covered it with fabric, using Mod Podge. I used the same technique to apply the fabric as my pizza pan project.


The corners were a little tricky.


Once the board was finished, I turned my attention to cutting a wall decal with my Silhouette. I found this saying on Pinterest and thought it would be perfect for the wall.


{Okay. I was going from memory and I accidentally changed the order of the words. I also forgot to include a comma. That is forthcoming. Promise!}

Here's the end result!


Whatcha think? It's simple, but I absolutely love it. And the magnets that I made last week are just right!

I can't wait to use it in the year to come. Here's to a happy 2012!!
Our Modish project this month was a magnetic memo board. I love this project - especially for the kitchen because my refrigerator is stainless steel so I always need a way to display the kiddos' artwork, my endless supply of lists, and various other lovelies.

This one is going into the office space that I share with my husband. It couldn't be too girly or I'd never hear the end of it!

All you need for this project is a large scrap of fabric, a pizza pan (or cookie sheet), Mod Podge, scissors, and a ribbon.


I also added an initial that I cut with my Silhouette from a sheet of Duck Tape. Did you know you can buy sheets of Duck Tape?? Imagine the possibilities!

Coat the back of your pan with a generous coat of Mod Podge. I used a child's foam brush to apply.


Lay your fabric over the Mod Podge and smooth into place. Add more Mod Podge around the edges and into the creases and press your fabric into place - working around the edge a little at a time.

I recommend working slowly so that your fabric stays in place as the glue dries. If you work too quickly, you run the risk of pulling the fabric loose.


Once your fabric is in place and the bond has started to set, trim around the edges. Try to maintain an even selvedge of about 1", but don't worry about perfection. This will be hidden on the backside of the pan. 


Clip into your allowance about 3/4" all of the way around the pan. This will help you secure the edges into place and keep a smooth fit with little bulk.


Flip your pan over and use more Mod Podge to secure the tabs in place, keeping a tight fit around the edge as you go around the pan.


Add your embellishments.


Glue a ribbon to serve as your hanger. I used the twill tape I had left over from the boys' tee-pee.

{Hooray for scraps!}


Voila! You're done!


Forgive my lame styling for this photo. All of my fun accessories are packed away until the move. I did have these magnetic tins on hand, which are perfect for paperclips, buttons, pins, etc...

I'm finishing up a fun, super simple project to share with you tomorrow. Pinterest-inspired, of course. Want a sneak peek? Any guesses?