
So, the idea of subway art has always fascinated me. It seems so freeing...
{You mean, I can use any words that I want, any font that I like, in any pattern that I wish? Shut the front door! That's awesome.}
So, I decided to experiment with a few different techniques to create an art piece for Ryder's room. I was also eager to put my sports letters to good use and this seemed like a perfect opportunity.
For this project, I used:
- 1 18"x24" canvas
- Scrap fabric (a piece large enough to cover the canvas and a smaller piece to run through my printer)
- Clear Contact Paper
- Acrylic paint
- Sports Letter Appliques
- Mod Podge
- Fabric glue
I started by laying out my design (to scale) in Adobe InDesign.

{Feel free to download for your own use.}
I found this vintage baseball graphic at TheGraphicsFairy.com.

I covered my canvas with fabric, adhering with Mod Podge.

Next, I began work on a set of stencils. I converted my artwork into a format that I could trace with my Silhouette software. I exported my file from InDesign as a JPEG.
I traced the artwork, which meant working with a couple of different Silhouette studio files. Because my layout is so large, I had to break down my design into pieces that could be cut with my Silhouette.
{If you would like these .studio files, I'm happy to share! Just e-mail me at rachelhgarza{at}gmail{dot}com.}
I cut the stencils out of clear Contact Paper (trimmed to a size that would run through my machine) and laid them out on my fabric-covered canvas and sponged over the letters with acrylic paint. I wanted the letters to look worn and rough so I used a minimum amount of paint on my sponge.

I've been looking for a reason to try printing on fabric so I decided to make a patch out of a different ticking fabric. I ironed my fabric onto Craft Bond, trimmed to size, and had no trouble running the piece though my inkjet printer.

I used a decorative stitch, reminiscent of a baseball's stitching, to frame around the image and trimmed the excess fabric away. I adhered my "patch" with fabric glue.


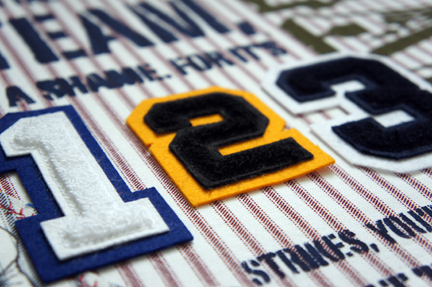
I left space in my layout to incorporate a few sports letters. Once I finished painting, I adhered the letters with fabric glue.

Here's the end result.

It's not a terrible first attempt. I'm definitely going to use it in the room. However, I'm not wild about the mix of vintage lettering with more modern appliques.
It was a great learning experience and I'm inspired to do more! I have a few ideas for more subway art for the boys' playroom. So... who knows what I'll have to share in the coming weeks...
Hey! I have an extra baseball fabric print that I made, but didn't use. If you would like it for your own project, leave a comment below. I'll select someone at random next Friday to send it to.


