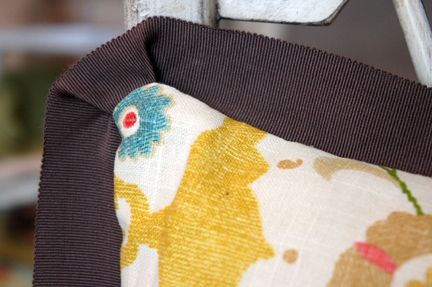
When you're looking at pillows this pretty!


And these pictures don't do them justice. The first pillow is not as lumpy as it appears here.

By the way, I started this project days ago to share with you, but someone was seriously competing for my attention.


He's pretty dramatic. :)

The first pillow is inspired by this Pinterest find:


I have two armchairs underneath my new window treatment and I thought the lumbar design would be a perfect fit for them.

Kristen from whoswatchingthebaby.com has a great tutorial for achieving this look with a quilter's jelly roll. You should check out her great interpretation!

Here's how I achieved mine.

{Pillow #1}

For the smaller pillow, you'll need:

2 pieces of coordinating fabric, 9.5" x 19"
3 yards of wide ribbon
Batting

Cut five 9.5" of ribbon, space them evenly across, and pin them to the fabric for the front of your pillow.


{I found this cotton trim on the clearance rack at Hancock for $1 a yard! I love a bargain!}

Sew a seam directly down the middle of each strip in a coordinating color.

Fold each ribbon so that the edges met in the middle and pin in place at 4.75".


Using your pin as a marker, sew a tight zig-zag stitch, starting approximately 1/4" above the pin, and finish approximately 1/4" below the pin. This stitch should be wide enough to join your ribbon edges together.

Be sure to use a locking stitch when you finish so that the threads will not pull loose.


Open and flatten the ribbon edges on both sides (and both ends) and stitch a zig-zag seam approximately 3" from the edge of the pillow towards the center of each strip.

Again, be sure to finish with a locking stitch so the threads will not pull loose.


Do this for all five strips.

Now, I'll step in with Pillow #2 to explain how to achieve the modern "ruffle."


Pin your ribbon to the right side of your backing fabric, allowing a little extra ribbon to finish the edges where the ends meet.


When you get to a corner, fold the ribbon this way:


This is how the ribbon should look when it is pinned completely around the pillow.


Remember point where the ends meet? Tuck the top ribbon under and stitch directly to the end that is underneath.


Run a basting stitch 1/2" from the edge of the pillow to secure the ribbon to the fabric.

Then, pin the front of the pillow to the back of the pillow with right sides together and stitch together with a 1/2" seam.

Be sure to leave room open to add your batting or pillow insert. I used batting for the smaller pillow and a 18" form for the larger.

Clip your corners close to the seam to reduce bulk. Turn right side out and stuff!


I would recommend closing your pillow with a slipstitch because it looks nicer, but if you have a zipper foot, you could run a seam to close your pillow.

And that's it!

I hope that you find some of that helpful or inspiring. I absolutely love the ribbon detail. It is so simple, but so pretty!

Happy Monday, friends!! I hope you have a wonderful week ahead! I'm facing two weeks full of papers, but the end of the semester is near. Say a prayer or two for me!

I took a nature walk with my boys today and happened to photograph a wish at sunset.


Just wanted to pass it along!
I think I may have shared this with you once before, but... I got my start with sewing window treatments. They are still my favorite sewing projects to tackle.

I purchased the fabric for our great room windows before we even moved in. I absolutely love this fabric.


We've been in the house for 5 months now and I finally worked up the courage to start the project. When I say "worked up the courage," I mean, I was terrified to cut this fabric. I really was.

After much debate, I settled on an out-of-print McCall's pattern - M3561, View D. It was one that I'd made years ago before with great results.

I wish this story had the same happy ending...

{Mistake #1}

I was working with 3 windows in a row so I decided to make one treatment to span the entire width, rather than one per window.

{Mistake #2}

I convinced myself that upholstery fabric would make a suitable contrasting fabric. I know better. I do.

{The Result}


It just looks a little sad to me. Maybe it will grow on me.

It's disappointing because I put so much time and effort (and money!) into this treatment. Obviously, if I were to do it again, I would make one treatment per window and use a proper weight contrasting fabric.

I still love the fabric and may order more for my dining room. I'm working up a few pillows with the remnants that I have left. I'll be sharing those with you later this week.

If you'd like to see pics of some of my past window projects, head on over to my Facebook page {give me a "Like" while you're there}. I'm always looking for window ideas. Maybe you'll see something there that inspires you!

Happy Thanksgiving!

Yep... I've been takin' care of business all weekend long! I'm trying to clear some items off of my "to do" list so that they won't be hanging over my head during the holidays.

The great news {for me, anyway} is that I've got some time off this week and have several creative projects to tackle! So, I'll be posting throughout the week, instead of waiting for the weekend.

Whoo-hoo!

Moving on to more fun business... look what came in over the weekend!!


My 7-year-old was so excited to see his handiwork on display in the magazine. This has been such an amazing experience.

Next on the agenda...

I really, really enjoyed reading all of your suggestions for what I should do with my sports letters. You ladies are such an inspiration!

I smiled, ooh and ahh'd, and slapped my head a few times, thinking "That's genius! Why didn't I think of that?"

{I actually have a board dedicated to these moments on Pinterest.}

The random number generator {yes, I've moved on from scrap paper in a bucket} selected Katie to receive a little bundle of these appliques for her own project. Congratulations, Katie!!

I look forward to sharing with you what I finally decided to do with the letters. Please check in with me again to find out if I'm successful.

{fingers crossed}

And finally, two minor announcements...

You may now find Always a Project at always-a-project.com and on Facebook at facebook.com/alwaysaproject! {I know, I know... I'm late to the party!}

My interaction with each of you is what makes this effort so special. I hope that Facebook will help us to exchange ideas even more often. So, if you log on, please "Like" my page.

Happy Monday! I look forward to touching base with you again throughout this holiday week!

I'm especially excited about this thrifty find that I picked up at the Salvation Army last month. They had a huge bin of new sports letter appliques and they were selling them 20 for $1! Can you believe that?!


I was reminded about my fun purchase thanks to Jodi Kahn's Homecoming Onesie post from earlier this week. Such a perfect project for this time of year!

But, I don't know what to do with my letters...

There are the usual suspects - t-shirts, sweatshirts, etc. But, I want to do something really fun.


It's been a while since I've done a giveaway so you are due! Leave me some comments with ideas about what you might do with these appliques. I'll pick someone at random on Sunday, November 20, to receive 5 of these pieces for your own project.

I can't wait to hear about what you have in mind!!
I have fallen deep into the "mommy trap."

You know... the one that convinces you to head to the kids' department instead of where you'd really rather be.

Oh wait! Are you there with me? Give me a wave!

For years, I've preached to my own mother about the need to enjoy shopping for herself. She deserves it! And I can see that it's really a struggle for her to break out of the "do only for others" mindset.

And, now, I've found that I've arrived. Motherhood. Wow. It changes a woman's life in every way possible.

Having said all of that, this week, rather than shopping, I decided to make something for myself. Skirts and more skirts!

I used a McCall's pattern - M3830 - for all three skirts.

Do you remember my most recent skirt disaster? Well, I had just enough fabric to make another one - one that fits!


And, yes, it is about 3 inches shorter than I'm usually comfortable with, but it's so stinkin' cute! I wore it to work this week and received so many compliments on it. A lady even stopped me in the grocery store to tell me how much she liked it.


As an aside, I was reviewing some of my older "pins" on Pinterest and look at this skirt that I pinned months ago!!! Completely unplanned. Totally crazy!


Sometimes, though very rarely, I'm in harmony with the fashion universe.

Here is second skirt that I made. Not really inspired by anything in particular. The fabric was on sale at fabric.com and I fell in love.


The third skirt is a funny story.

I was inspired by this skirt from Shabby Apple {minus the humongous flower}.


First the pictures...


Second, the confession...


It's made from decorator fabric! Some that I had left over from another project. It has such a pretty sheen and nice body so I decided to give it a try.

It actually turned out to be my favorite of the three.

It only took me about an hour per skirt and the pattern was so simple to execute.

$1 for the pattern and less than $15 dollars in materials for all three skirts.

There is no reason not to have a closet full of pencil skirts for every occasion now!

So, go forth and make a skirt!
What the what?!!!!!!

I am still completely stunned by all of this.

{And, I'm sure this is the only time that I will share web real estate with Paula Deen!}

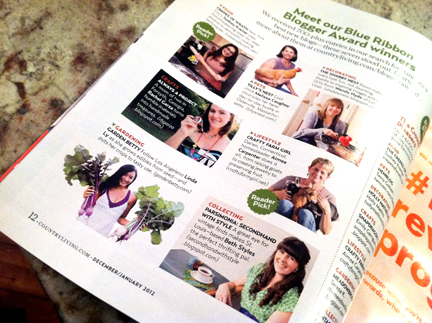
Check out CountryLiving.com homepage today! Follow the link for an inside look at the awards luncheon!


Want to learn how to make these beautiful ribbons? Cathe Holden, of justsomethingimade.com, has the step-by-step tutorial posted on her blog today! You'll be inspired to create a dozen!


I am finally making progress on my playroom/studio space! I ordered the fabric ages ago and it's been staring at me... for ages... wondering when I plan to use it.

Do you remember my grand plans for the room? The challenge is to create a space that works for me (girly!) and my boys (definitely not girly).

It's a challenge.

I am happy to report that Project #1 is complete! Toy storage bench cushions!

They can be used as floor pillows, too. {Bonus!}

This is the third time that I've made over these cushions and each time, they get better. They do! That might mean that I've learned a few tricks along the way.

All you need is three pieces of fabric and foam.

Use this simple equation on the diagram below to figure out what size to cut your fabric pieces. Join all three pieces together, end to end, with the pieces aligned in the center (see sketch).


My finished cushions measure 39" wide (W) by 21" deep (D) and they are 3" tall (H).


Begin your line of stitches 1/2" from the edge of the fabric and use a 1/2" seam.


Be sure to backstitch each of your seams. I'd be the first to tell you if you could skip this step, but it's really important for this project.

Turn the ends of your stitched panels 3/4" toward the inside of your pillow cover and stitch into place.


Clip into the selvage of your middle panel, just shy of the seam.


That way you can turn your fabric to start creating a boxed corner for your pillow. 

Stitch in place, stopping 1/2" from the edge.


Repeat for the other corners.

Clip the long edge just shy of the seam.


Pivot and sew the long edges into place, sewing past the hemmed end (be sure to backstitch!!).


Finish one side of your pillow before stitching the other end into place. This will help you to form the envelope flap in the back.


This is how your boxed corners should look before you turn the cover right-side out.


And here's how your corners should look once you've turned the cover right-side out and added your foam inserts.


Okay. So, by now you know that I always search for the more economical route. 

*smile*

I wanted a 3 inch cushion with a soft top, but good foam is EXPENSIVE! Here's how I achieved my desired height.


And here's the finished result!


I hope I did an accurate job of explaining the "how to." It really is one of the simplest sewing projects you'll ever attempt. Promise!

If you have any questions, please do not hesitate to contact me.

Now, on to window treatments!
Oh my goodness! You would not believe the past few days that I’ve had. It’s truly been an adventure of a lifetime. The turnip truck? Keep reading… I’ll explain myself later.

You may remember my post from September. I discovered that my blog was a finalist in the “Craft” category for the First Annual Blue Ribbon Blogger Awards hosted by Country Living Magazine. I was over the moon!!

But... the weeks ticked by and there was no news. I had accepted that I must not be a winner. My fellow finalists were so talented! How could I compete?

Imagine my surprise to receive an e-mail last month from one of the Country Living staffers informing me that I won the Judges’ Vote for my category! I was in total disbelief!

In fact, I didn’t really believe it until the plane took off for New York City on Wednesday of this week.

My husband and I checked in at the Dream Hotel... 


...and spent the afternoon ticking a few items off of our bucket lists. We took in a Broadway play… 


...wandered the streets of the city… 


...spotted the Naked Cowboy… 


{I didn’t even know that was on my bucket list, but… CHECK!}

On Thursday, Country Living hosted a lovely awards luncheon for us on the 44th floor of the Hearst Tower. 


Unbelievable views of the city!


We were introduced to the other winners in each category. I am in awe of these women, each so talented and confident. I am honored to be among them!

We spent time getting acquainted with each other and the Country Living staff. Let me attest – they are all warm, wonderful people! Would you expect anything less from such an amazing publication? They made each of us feel welcome from “Hello!”


Editor-in-Chief Sarah Gray Miller was in attendance, as well as celebrity judges Jodi Kahn, Cooper Boone, and Sarah McColl. I didn’t have the opportunity to meet her, but Cooper brought his friend, the beautiful Emme!


During lunch, Cooper introduced each of us and presented our awards. He was the perfect man for the job! Witty and charming {and handsome}, he put us all at ease with his casual banter.


My creative idol, Cathe Holden, designed the beautiful award ribbon that was presented inside of a cloche. So perfect and so meaningful!


After lunch, we had more time to visit and take photos. 


With the FABULOUS Jodi Kahn... Yeah... she's amazing!

And, with Sarah Gray Miller!!!!!! She told me that she liked the new 'do!

CL Staffer (and logistics genius) Mehdi took us for a stroll through the Good Housekeeping Institute on the 29th floor and the Country Living offices on the 32nd floor.


Test kitchen!!

CL Prop Closet! Can I have just a few more minutes, please??

Ready for my “turnip truck” moment? 

We were lingering in the hallway for a bit before leaving the Tower. Suddenly, two massive boardroom doors swung open and I found myself face-to-face with Donatella Versace. Gawking. Completely star struck. Completely ridiculous. Completely in her way. And. I. Couldn’t. Move.

Wait! It gets better {or worse}! Gayle King appears. Gorgeous. Gracious. Obviously confused why I was still standing in the way. 

Did I mention that I couldn’t move?

Somehow, I did manage to turn around to watch Donatella put on her gorgeous purple and black coat…

Good grief! What was I wearing?

Shall I go on? There’s more…

Nina Garcia and Joanna Coles step off of the elevator. I’m not kidding. I looked up just in time to see my husband start pointing in their direction with a big, goofy grin on his face!

Forgive us, please, NYC, we just don’t know how to behave ourselves sometimes.

Thank you so much, Country Living, for this truly great honor. There are not words to express how much it means. It will be tough to ever top this experience! May I come back sometime?

I return home, invigorated and inspired to continue working, writing, and sharing my soul with the creative world.